
Indian Chapati, also known as roti, is a staple in Indian households and is cherished for its simplicity, versatility, and nutritional benefits. Made from whole wheat flour, roti is soft, pliable, and pairs beautifully with almost any curry, dal, or vegetable dish. If you’re new to cooking or simply looking to perfect the art of making chapati, you’ve come to the right place. In this blog, I’ll guide you through the process of making soft and delicious chapati at home.
Why Make Homemade Chapati ?
There’s something incredibly satisfying about making chapati from scratch. It’s not just a dish; it’s a tradition passed down through generations. Homemade chapati is fresher, tastier, and free from preservatives. Plus, it’s healthier than store-bought options, as whole wheat flour is rich in fiber, vitamins, and minerals.
Once you master the technique, you’ll find that making chapati is quicker and easier than you might think. So, roll up your sleeves and let’s dive into this wholesome journey.
Ingredients
To make approximately 8–10 chapatis:
- 2 cups whole wheat flour (atta)
- ½ teaspoon salt (optional)
- ¾ cup water (adjust as needed)
- 1 teaspoon oil or ghee (optional, for softer rotis)
- Extra dry wheat flour for rolling
Step-by-Step Recipe
Step 1: Prepare the Dough
- Combine Ingredients: In a large mixing bowl, combine the whole wheat flour and salt (if using). Gradually add water, a little at a time, while mixing with your hand or a spoon.
- Knead the Dough: Once the mixture starts to come together, knead it with your hands until it forms a smooth, soft dough. The dough should be pliable but not sticky. If it feels too dry, add a few drops of water. If it’s too sticky, sprinkle a little more flour.
- Rest the Dough: Cover the dough with a damp cloth or plastic wrap and let it rest for 20–30 minutes. This resting period allows the gluten to develop, making the chapati softer and easier to roll. This step is important for making soft chapati.
Step 2: Roll the Chapati
- Divide the Dough: After resting, divide the dough into small, equal-sized balls (about the size of a golf ball).
- Flatten and Roll: Lightly dust a rolling board and your rolling pin with dry flour. Take one ball of dough, flatten it slightly, and roll it out into a thin, circular shape. Aim for even thickness, about 6–8 inches in diameter. Don’t worry if the shape isn’t perfect—practice makes perfect!
Step 3: Cook the Chapati
- Heat the Pan: Place a tawa (flat griddle) or a non-stick skillet on medium heat. Allow it to heat up for a minute or two.
- Cook the First Side: Place the rolled-out chapati on the hot tawa. Cook for 20–30 seconds or until you see bubbles forming on the surface.
- Flip the Roti: Flip it over using tongs or a spatula. Cook the other side for about 30 seconds.
- Final Flip and Puff: Flip the chapati again and gently press it with a spatula or a clean cloth. This helps the chapati puff up. If it doesn’t puff, don’t worry—it will still taste great!
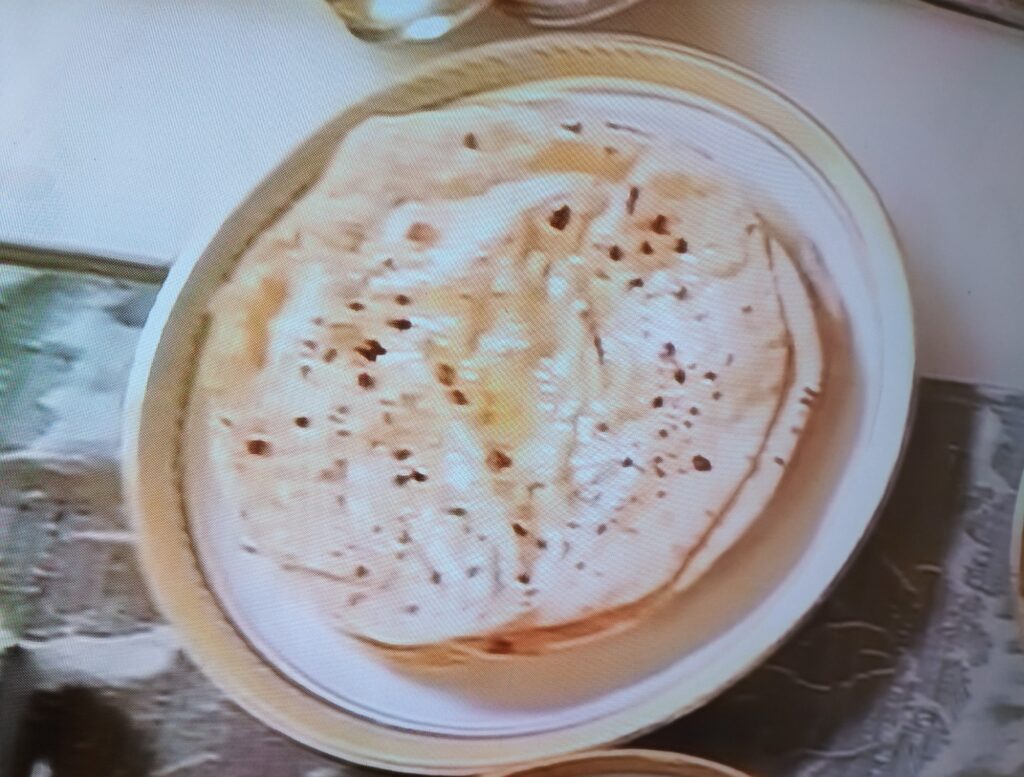
- Remove and Keep Warm: Transfer the cooked chapati to a plate or a container lined with a clean cloth. Cover it to keep it warm and soft. Repeat with the remaining dough balls.
Tips for Perfect Chapati
- Use Fresh Flour: Fresh, high-quality wheat flour makes a big difference in the taste and texture of your chapati
- Consistency Matters: The dough should be soft but not sticky. Overly dry or hard dough will result in tough chapati.
- Even Rolling: Try to roll the dough evenly to ensure the chapati cooks uniformly. Uneven thickness can lead to uneven cooking.
- Right Heat: The tawa should be hot but not smoking. Too low a heat will dry out the chapati, while too high a heat can burn it.
- Practice Makes Perfect: Don’t be discouraged if your first few chapatis aren’t perfectly round or don’t puff up. With time and practice, you’ll get the hang of it, as with practice perfection comes.
Serving Suggestions
Chapati is incredibly versatile and pairs well with a variety of dishes. Here are a few ideas:
- With Curry: Serve chapati with your favorite curry, such as butter chicken, paneer kolhapuri, paneer masala, or chana masala.
- With Dal: Enjoy it with a bowl of comforting dal tadka or dal makhani.
- With Vegetables: Pair chapati with sauteed vegetables, such as aloo gobi, bhindi masala, or baingan bharta.
- As a Wrap: Use chapati as a base for wraps or rolls by adding a filling of your choice, such as spiced chickpeas, paneer, or grilled chicken.
Why You’ll Love This Recipe
Making chapati at home is not just about cooking; it’s about connecting with a tradition that has nourished countless families over centuries. The simple, wholesome ingredients make it a nutritious addition to your meal, while its soft, pliable texture makes it universally loved.
Whether you’re serving it to your family or making it for yourself, there’s something incredibly fulfilling about tearing into a warm, freshly made chapati and savoring its flavor with your favorite side dish.
Conclusion
Chapati is a testament to the idea that simple food can be incredibly satisfying. With just a handful of ingredients and a little practice, you can create soft, delicious chapatis that will elevate any meal.
Try this recipe at home and let me know how it turns out. Do you have your own tips or variations for making chapati ? Share your thoughts in the comments below—I’d love to hear from you. Happy cooking!
भारतीय रोटी
एक सादा और पौष्टिक भारतीय व्यंजन
भारतीय रोटी, जिसे चपाती भी कहा जाता है, भारतीय घरों में एक मुख्य व्यंजन है। यह अपनी सरलता, बहुमुखी उपयोगिता और पोषण गुणों के लिए बेहद पसंद किया जाता है। पूरे गेहूं के आटे से बनी चपाती मुलायम और लचीली होती है, जो किसी भी करी, दाल या सब्जी के साथ बेहतरीन मेल खाती है। यदि आप खाना बनाना सीख रहे हैं या चपाती बनाने की कला को परिपूर्ण करना चाहते हैं, तो आप सही जगह पर हैं। इस ब्लॉग में, मैं आपको घर पर मुलायम और स्वादिष्ट चपाती बनाने की प्रक्रिया सिखाऊंगा।
घर पर चपाती क्यों बनाएं?
चपाती को घर पर बनाने का एक अलग ही आनंद है। यह सिर्फ एक व्यंजन नहीं है, बल्कि पीढ़ी दर पीढ़ी चली आ रही एक परंपरा है। घर पर बनी चपाती ताजी, स्वादिष्ट और प्रिज़र्वेटिव्स से मुक्त होती है। साथ ही, यह बाजार में मिलने वाली रोटी की तुलना में ज्यादा सेहतमंद होती है, क्योंकि पूरे गेहूं के आटे में फाइबर, विटामिन और खनिज भरपूर मात्रा में होते हैं।
एक बार जब आप इसे बनाना सीख लेंगे, तो आपको लगेगा कि चपाती बनाना जितना लगता है उससे कहीं ज्यादा आसान और तेज़ है। तो चलिए, इस स्वादिष्ट यात्रा की शुरुआत करते हैं।
आवश्यक सामग्री
8–10 चपातियों के लिए:
- 2 कप गेहूं का आटा (आटा)
- ½ चम्मच नमक (वैकल्पिक)
- ¾ कप पानी (आवश्यकतानुसार समायोजित करें)
- 1 चम्मच तेल या घी (वैकल्पिक, मुलायम रोटी के लिए)
- बेलने के लिए सूखा आटा
स्टेप-बाय-स्टेप रेसिपी
स्टेप 1: आटा गूंथना
- सामग्री मिलाएं: एक बड़े कटोरे में आटा और नमक (यदि उपयोग कर रहे हैं) मिलाएं। धीरे-धीरे थोड़ा-थोड़ा पानी डालें और अपने हाथों या चम्मच से मिलाएं।
- आटा गूंथें: जब मिश्रण एक साथ आने लगे, तो इसे नरम और चिकना आटा बनने तक गूंथें। आटा चिपचिपा नहीं होना चाहिए। अगर यह सूखा लगे, तो थोड़ी मात्रा में पानी डालें। अगर यह चिपचिपा हो, तो थोड़ा सूखा आटा डालें।
- आटे को आराम दें: आटे को गीले कपड़े से ढकें और 20–30 मिनट तक आराम करने दें। यह समय आटे में ग्लूटेन विकसित करने में मदद करता है, जिससे चपाती मुलायम बनती है। यह चरण नरम चपाती बनाने के लिए महत्वपूर्ण है।
स्टेप 2: चपाती बेलना
- आटा बांटें: आटे को आराम देने के बाद, इसे छोटे-छोटे बराबर आकार के गोले (गोल्फ बॉल के आकार के) में बांट लें।
- चपाती बेलें: बेलन और चकले पर हल्का सूखा आटा छिड़कें। एक गोला लें, उसे हल्का चपटा करें और पतली, गोल चपाती बेलें। यह लगभग 6–8 इंच व्यास का होना चाहिए। अगर आकार परफेक्ट न हो, तो चिंता न करें—प्रैक्टिस से सुधार होगा!
स्टेप 3: चपाती सेंकना
- तवा गरम करें: एक तवा या नॉन-स्टिक पैन को मध्यम आंच पर गरम करें।
- पहला पक्ष पकाएं: बेली हुई चपाती को गरम तवे पर रखें और 20–30 सेकंड तक पकाएं जब तक उस पर बुलबुले न बनने लगें।
- पलटें और पकाएं: चपाती को पलटें और दूसरा पक्ष 30 सेकंड तक पकाएं।
- फाइनल फ्लिप और फूलना: चपाती को फिर से पलटें और एक साफ कपड़े या स्पैचुला से हल्के से दबाएं। यह चपाती को फूलने में मदद करेगा। अगर यह न फूले, तो भी इसका स्वाद बेहतरीन रहेगा।
- गर्म रखें: पकी हुई चपाती को एक साफ कपड़े में लपेटें ताकि वह नरम और गर्म रहे। बाकी गोले के साथ यही प्रक्रिया दोहराएं।
परफेक्ट चपाती बनाने के टिप्स
- ताजा आटा उपयोग करें: ताजा और उच्च गुणवत्ता वाला गेहूं का आटा चपाती के स्वाद और बनावट में बड़ा अंतर लाता है।
- नरम आटा: आटा नरम होना चाहिए, लेकिन चिपचिपा नहीं।
- समान बेलना: चपाती को समान मोटाई में बेलने की कोशिश करें ताकि वह समान रूप से पक सके।
- सही आंच: तवा गरम होना चाहिए, लेकिन धुआं छोड़ने लायक नहीं।
- धैर्य रखें: अगर पहली कुछ चपातियां परफेक्ट न बनें, तो निराश न हों। अभ्यास से सुधार होगा।
चपाती के साथ परोसने के सुझाव
चपाती बेहद बहुमुखी है और कई व्यंजनों के साथ अच्छी लगती है।
- करी के साथ: इसे बटर चिकन, पनीर टिक्का मसाला, या छोले मसाले के साथ परोसें।
- दाल के साथ: इसे दाल तड़का या दाल मखनी के साथ खाएं।
- सब्जियों के साथ: इसे आलू गोभी, भिंडी मसाला, या बैंगन का भरता के साथ मिलाएं।
- रैप के रूप में: चपाती में चने, ग्रिल्ड चिकन, या पनीर भरकर रैप बनाएं।
निष्कर्ष
चपाती यह सिद्ध करती है कि सादगी में भी संतोष पाया जा सकता है। कुछ सामग्री और थोड़े अभ्यास से आप ऐसी मुलायम और स्वादिष्ट चपातियां बना सकते हैं जो किसी भी भोजन को और खास बना दें।
इस रेसिपी को घर पर आजमाएं और मुझे बताएं कि यह कैसा बना। क्या आपके पास चपाती बनाने के कुछ टिप्स या वेरिएशन्स हैं? अपनी राय और अनुभव कमेंट्स में साझा करें—मुझे सुनने में खुशी होगी।
खुशहाल पकवान!😊
Leave a Reply