Flavorful Dish for Everyday Meals
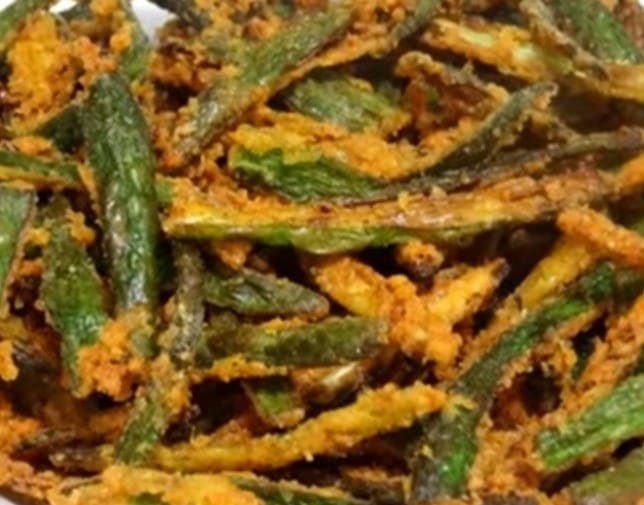
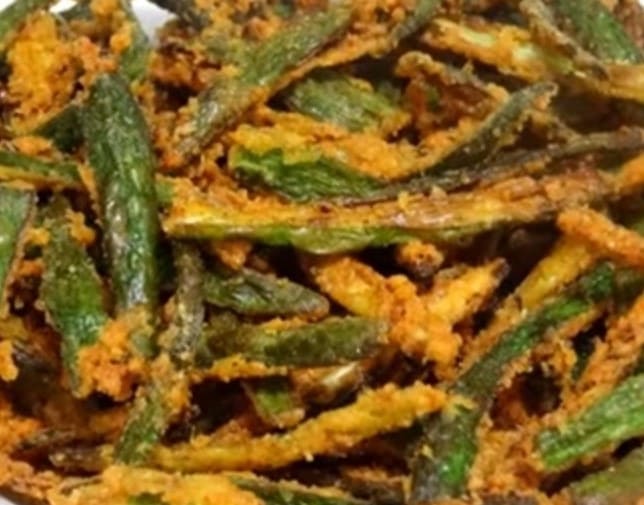
Ladyfinger Fry Recipe is one of those timeless Indian recipes that can brighten up any meal. Whether you’re serving it with a comforting plate of dal and rice or pairing it with soft chapatis, this dish offers a delightful balance of flavors and textures. With its crispy, slightly charred edges and the warm spices infused into every bite, Bhindi Fry has earned its place in many Indian households as a go-to side dish.
Ladyfinger also known as bhindi, is not only delicious but also packed with nutrients. Rich in fiber, vitamins, and antioxidants, it’s great for digestion, supports immunity, and even helps manage blood sugar levels. This Ladyfinger Fry recipe is not just about health—it’s also about creating a dish that’s bursting with flavor while being simple to prepare.
Why Make Ladyfinger Fry?
For those who love quick and fuss-free cooking, Ladyfinger Fry is a fantastic choice. Unlike recipes that demand hours of preparation, this one can be whipped up in under 30 minutes, making it perfect for busy weekdays. Plus, it requires minimal ingredients—most of which are staples in Indian kitchens.
This recipe is also incredibly versatile. Whether you prefer a mildly spiced dish or something with a bold flavor, you can easily adjust the spices to suit your palate. And if you’re someone who enjoys experimenting, you can add onions, tomatoes, or even a sprinkle of amchur (dry mango powder) for a tangy twist.
Ingredients
For the Dish:
- 250 grams of fresh Ladyfinger
- 2 tablespoons of oil (mustard oil, vegetable oil, or any neutral cooking oil)
- 1 teaspoon cumin seeds
- 1 teaspoon cumin powder
- 1 green chili, slit lengthwise (adjust based on spice preference)
- ½ teaspoon turmeric powder
- 1 teaspoon red chili powder
- 1 teaspoon coriander powder
- ½ teaspoon garam masala (optional, for a rich aroma)
- Salt to taste
Optional Ingredients:
- 2 tablespoon gram flour (besan) for extra crispiness
- 1 tablespoon rice flour
- A squeeze of lemon juice or a teaspoon of amchur for tanginess
- Fresh coriander leaves for garnish
Preparing the Ladyfinger
The key to a good Ladyfinger Fry lies in how you prepare the Ladyfinger . Here’s how to do it right:
- Wash Thoroughly: Rinse the Ladyfinger under running water to remove any dirt.
- Dry Completely: Pat the Ladyfinger dry with a clean kitchen towel or let them air-dry. Any moisture left on the Ladyfinger can make the dish slimy during cooking.
- Trim and Cut: Trim the ends and slice the Ladyfinger into uniform pieces—about 1–2 inches long. Uniform cutting ensures even cooking.
Step-by-Step Recipe
Step 1: Heat the Oil
- Heat 2 tablespoons of oil in a wide, heavy-bottomed pan over medium heat. A wide pan ensures the Ladyfinger cooks evenly without getting soggy.
- Add the cumin seeds and let them sizzle for a few seconds. This releases their earthy aroma.
Step 2: Cook the Bhindi
- Add the sliced Ladyfinger to the pan and give it a gentle stir to coat it in the oil.
- Sprinkle turmeric powder, turmeric not only adds color but also acts as a natural disinfectant. Add salt.
- Stir gently and let the Ladyfinger cook uncovered for 8–10 minutes. Stir occasionally, but not too frequently, to prevent breaking the pieces.
Step 4: Spice It Up
- Once the Ladyfinger is almost cooked, add red chili powder, coriander powder, zeera powder and garam masala. Mix gently to coat the pieces in the spices.
- If you like extra crispy Ladyfinger, sprinkle a tablespoon of gram flour and rice flour. Cook for another 2–3 minutes. The gram flour and rice flour absorbs any residual moisture and adds a crunchy texture.
Step 5: Final Touch
- Turn off the heat and add a squeeze of lemon juice or a sprinkle of amchur powder for a tangy twist.
- Garnish with fresh coriander leaves for a burst of freshness.
Tips for the Perfect Bhindi Fry
- Use Fresh Ladyfinger: Always choose tender, fresh Ladyfinger for the best taste and texture.
- Dry Thoroughly: Moisture is the main reason for slimy Ladyfinger. Drying it completely before cooking ensures crisp results.
- Wide Pan is Key: A wide pan allows the Ladyfinger to spread out and cook evenly without steaming.
- Minimal Stirring: Stir the Ladyfinger gently and only when needed to avoid breaking the pieces.
- Customizable Spices: Don’t hesitate to adjust the spices based on your preferences. Add more chili for heat or garam masala for a deeper flavor.
Serving Suggestions
Ladyfinger Fry is incredibly versatile and can be paired with:
- Roti or Paratha: Serve it as a side dish with hot rotis or flaky parathas for a hearty meal.
- Steamed Rice: Pair it with dal and steamed rice for a comforting and wholesome lunch.
- Yogurt or Raita: A bowl of chilled yogurt or cucumber raita complements the spices and adds a cooling element.
Health Benefits of Ladyfinger
- High in Fiber: Ladyfinger is excellent for digestion and helps maintain gut health.
- Low in Calories: It’s a great addition to weight-loss diets.
- Rich in Antioxidants: Ladyfinger is packed with vitamins A and C, which boost immunity.
- Blood Sugar Control: The mucilaginous fiber in Ladyfinger helps stabilize blood sugar levels, making it suitable for diabetics.
Conclusion
Ladyfinger Fry is proof that simple recipes can be incredibly delicious and satisfying. It’s quick to prepare, packed with flavor, and offers a healthy option for your everyday meals. Whether you’re an experienced cook or just starting your culinary journey, this recipe is easy to follow and delivers fantastic results every time.
So, the next time you’re looking for a flavorful vegetable dish to complement your meal, give Ladyfinger Fry a try. Its crisp texture, warm spices, and delightful taste are sure to win over your family and guests. And don’t forget to share your experience in the comments—I’d love to know how you made it your own!
Happy Cooking!
भिंडी फ्राई रेसिपी –

स्वाद और सेहत का अनोखा संगम
भिंडी फ्राई रेसिपी उन भारतीय व्यंजनों में से एक है जो किसी भी खाने को खास बना सकती है। इसे दाल-चावल के साथ परोसा जाए या नरम चपातियों के साथ, यह डिश स्वाद और टेक्सचर का बेहतरीन तालमेल पेश करती है। इसके कुरकुरे किनारे और हर बाइट में घुले हुए मसालों की गर्माहट इसे भारतीय रसोइयों में एक खास जगह दिलाती है।
भिंडी, जिसे लेडीफिंगर भी कहा जाता है, स्वादिष्ट होने के साथ-साथ पोषक तत्वों से भरपूर होती है। फाइबर, विटामिन्स और एंटीऑक्सीडेंट्स से भरपूर भिंडी पाचन को बेहतर बनाती है, रोग प्रतिरोधक क्षमता को बढ़ाती है और ब्लड शुगर लेवल को नियंत्रित करने में मदद करती है।
भिंडी फ्राई क्यों बनाएं?
अगर आपको झंझट-मुक्त और जल्दी बनने वाले व्यंजन पसंद हैं, तो भिंडी फ्राई एक शानदार विकल्प है। यह रेसिपी 30 मिनट से भी कम समय में तैयार हो सकती है, जो इसे व्यस्त दिनों के लिए परफेक्ट बनाती है।
यह रेसिपी बेहद लचीली है। आप इसे अपने स्वाद के अनुसार हल्का मसालेदार या तीखा बना सकते हैं। साथ ही, आप इसमें प्याज, टमाटर या अमचूर पाउडर का ट्विस्ट भी जोड़ सकते हैं।
सामग्री
भिंडी फ्राई के लिए:
- 250 ग्राम ताजी भिंडी
- 2 टेबलस्पून तेल (सरसों का तेल, वनस्पति तेल या कोई भी तटस्थ तेल)
- 1 टीस्पून जीरा
- 1 टीस्पून जीरा पाउडर
- 1 हरी मिर्च (लंबाई में कटी हुई, मसाले के अनुसार मात्रा घटाएं-बढ़ाएं)
- ½ टीस्पून हल्दी पाउडर
- 1 टीस्पून लाल मिर्च पाउडर
- 1 टीस्पून धनिया पाउडर
- ½ टीस्पून गरम मसाला (वैकल्पिक, खुशबू के लिए)
- स्वादानुसार नमक
वैकल्पिक सामग्री:
- 2 टेबलस्पून बेसन (अतिरिक्त कुरकुरापन के लिए)
- 1 टेबलस्पून चावल का आटा
- 1 टीस्पून अमचूर या नींबू का रस
- ताजा धनिया पत्ती (गार्निश के लिए)
भिंडी तैयार करने के टिप्स
अच्छी भिंडी फ्राई का राज भिंडी की सही तैयारी में है:
- अच्छी तरह धोएं: भिंडी को बहते पानी के नीचे अच्छी तरह से धो लें।
- पूरी तरह सुखाएं: भिंडी को साफ कपड़े से पोंछ लें या हवा में सूखने दें। नमी भिंडी को पकाते समय चिपचिपा बना सकती है।
- समान टुकड़ों में काटें: भिंडी के दोनों सिरे काटकर इसे 1-2 इंच के टुकड़ों में काट लें।
स्टेप-बाय-स्टेप रेसिपी
स्टेप 1: तेल गरम करें
- एक चौड़े, भारी तले वाले पैन में 2 टेबलस्पून तेल मध्यम आंच पर गरम करें।
- इसमें जीरा डालें और इसे चटकने दें।
स्टेप 2: भिंडी पकाएं
- कटे हुए भिंडी के टुकड़े पैन में डालें और हल्के हाथों से चलाएं ताकि यह तेल में अच्छी तरह लिपट जाए।
- हल्दी पाउडर और नमक डालें।
- भिंडी को 8-10 मिनट तक बिना ढके पकाएं। इसे बीच-बीच में धीरे-धीरे चलाएं।
स्टेप 3: मसाले डालें
- जब भिंडी लगभग पक जाए, तब लाल मिर्च पाउडर, धनिया पाउडर, और जीरा पाउडर डालें।
- अगर आप अधिक कुरकुरी भिंडी पसंद करते हैं, तो बेसन और चावल का आटा छिड़कें। इसे 2-3 मिनट तक और पकाएं।
स्टेप 4: अंतिम चरण
- आंच बंद करें और ऊपर से नींबू का रस या अमचूर पाउडर छिड़कें।
- धनिया पत्ती से सजाएं।
भिंडी फ्राई को परोसने के तरीके
- रोटी या पराठा: इसे गरम रोटी या पराठे के साथ परोसें।
- चावल और दाल: इसे दाल और चावल के साथ मिलाकर खाएं।
- रायता: खीरे या पुदीने के रायते के साथ इसका स्वाद और भी निखरता है।
भिंडी के स्वास्थ्य लाभ
- फाइबर से भरपूर: पाचन को सुधारती है।
- कम कैलोरी: वजन घटाने वाले आहार के लिए उपयुक्त।
- एंटीऑक्सीडेंट्स से भरपूर: रोग प्रतिरोधक क्षमता को बढ़ाती है।
- ब्लड शुगर नियंत्रण: डायबिटीज के लिए फायदेमंद।
निष्कर्ष
भिंडी फ्राई यह साबित करती है कि आसान रेसिपी भी स्वादिष्ट और संतोषजनक हो सकती है। इसे बनाना न केवल सरल है, बल्कि यह हर बार शानदार परिणाम देती है।
तो अगली बार जब आप अपनी थाली में एक स्वादिष्ट सब्जी जोड़ना चाहें, तो भिंडी फ्राई जरूर ट्राई करें। इसकी कुरकुरी बनावट, मसालों का जादू और अद्भुत स्वाद आपके परिवार और मेहमानों को जरूर पसंद आएगा।
खुशहाल खाना पकाने की शुभकामनाएं!

Leave a Reply