
If you’re a fan of dosas but want to incorporate healthier ingredients into your diet, oat dosa is the perfect solution. This dish combines the goodness of oats with the irresistible crispiness of a traditional dosa, making it a wholesome and delicious meal option. Whether it’s breakfast, lunch, or dinner, oat dosa is a versatile dish that ticks all the boxes for taste and nutrition.
In this blog, I’ll walk you through the step-by-step process of making oat dosa that’s light, crispy, and full of flavor.
Why Oat Dosa?
Oats are a powerhouse of nutrients, rich in fiber, protein, and essential minerals. It’s gluten-free, easy to digest, and keeps you full for longer, making it ideal for weight management and overall health.
Oat dosa is also quick and easy to prepare, making it perfect for busy mornings or when you want a fuss-free meal.
Ingredients
For the Batter:
- 1 cup rolled oats (or quick oats)
- 1/2 cup urad bean/ lentils
- 1/4 cup chickpea lentils or rice flour (optional, for extra crispiness)
- 1 tablespoon fenugreek seeds
- 1/2-1 cup water (adjust consistency as needed, consistency should be little bit flowing )
- 1/2 tablespoon Salt ( to taste )
- For Flavoring- A handful of fresh coriander leaves, chopped ( optional )
For Cooking:
- Ghee or oil, as needed
Step-by-Step Recipe for Oat Dosa
Step 1: Prepare the Batter
- Grind the Oats:
in a big bowl mix oat, urad dal chana dal and fenugreek seeds. Rinse well all the ingredients, then add enough water, cover with lid and soak for 3-4 hours. After 3-4 hours transfer it to a blender and add water now grind it using a blender or food processor. Almost 3/4 cup of water requires, to make smooth paste. This forms the base of your dosa batter. - Fermentation: Ferment for 4-5 hours or overnight. Fermentation enriches in vitamin B and helps in digestion. Add salt and mix well.
Step 2 : Check Consistency
If the batter has thickened too much, add a little water to bring it back to the desired consistency.
Step 3: Cook the Oat Dosas
- Heat the Pan:
Heat a non-stick or cast-iron skillet over medium heat. Grease it lightly with ghee or oil. - Pour the Batter:
Take a ladleful of batter and pour it onto the center of the pan. Using the back of the ladle, spread the batter in a circular motion to form a thin dosa. - Cook Until Crisp:
Drizzle a little oil or ghee around the edges. Cook the dosa on medium heat until the edges start to lift and the bottom turns golden brown. - Flip (Optional):
If you like your dosa slightly crispy on both sides, flip it and cook for another 1–2 minutes. Otherwise, fold and remove from the pan. - Repeat:
Repeat the process with the remaining batter. Stir the batter occasionally to prevent the ingredients from settling at the bottom.
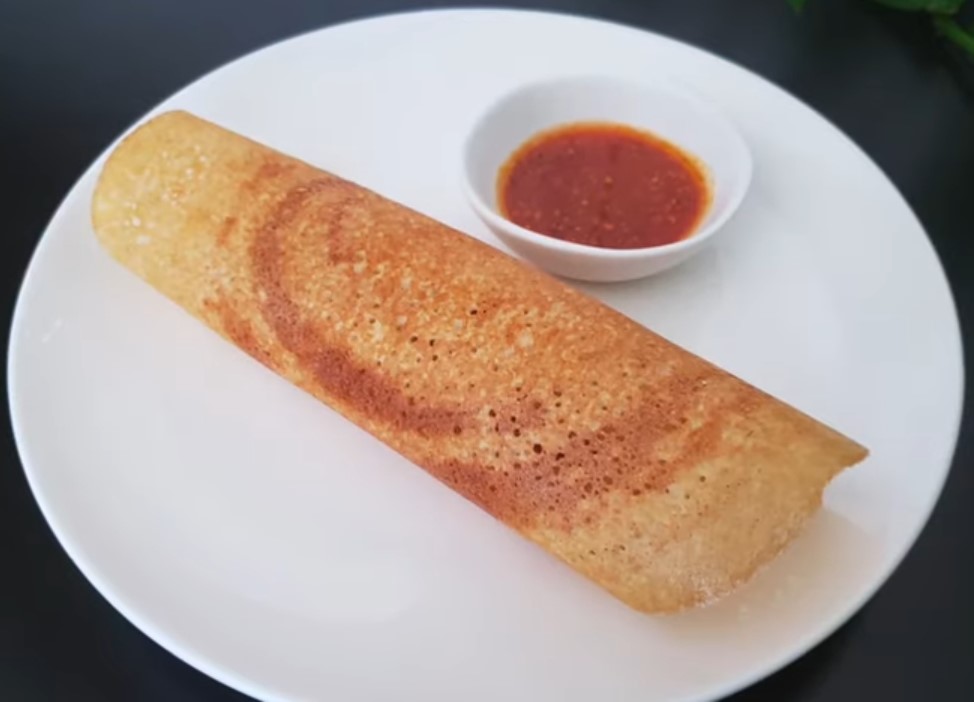
Serving Suggestions
Oat dosa pairs wonderfully with a variety of accompaniments:
- Coconut Chutney: The creamy, nutty flavor complements the dosa beautifully.
- Tomato Chutney: Adds a tangy and slightly spicy kick.
- Sambar: A warm, comforting option for a hearty meal.
- Mint-Coriander Chutney: A fresh and zesty pairing for a lighter meal.
4 Tips for the Perfect Oat Dosa
- Batter Consistency: Ensure the batter is not too thick. Thin batter spreads more easily and results in crispier dosas.
- Resting Time: Allowing the batter to rest ensures better absorption of flavors and an even texture.
- Greasing the Pan: Use a minimal amount of oil or ghee to prevent sticking, especially if you’re using a cast-iron pan.
- Low to Medium Heat: Always cook dosas on low to medium heat to ensure even cooking without burning.
Why You’ll Love Oat Dosa
- Quick and Easy: No fermentation required! You can whip up the batter and cook the dosas in under an hour.
- Healthy and Filling: Packed with fiber and nutrients, this dosa keeps you energized and satisfied.
- Customizable: Add your favorite vegetables, herbs, or spices to the batter for endless variations.
Conclusion
Oat dosa is a delicious, healthy twist on a beloved classic. It’s a dish that’s as good for your taste buds as it is for your body. Whether you’re looking for a quick weekday breakfast, a light dinner, or something nutritious for your family, oat dosa is the perfect choice.
Try this recipe today and let me know how it turned out! Did you customize it with any special add-ins? I’d love to hear about your creative variations in the comments below. Happy cooking!
ओट्स डोसा
अगर आप डोसा के शौकीन हैं लेकिन अपनी डाइट में सेहतमंद सामग्री शामिल करना चाहते हैं, तो ओट्स डोसा आपके लिए एक बेहतरीन विकल्प है। यह व्यंजन ओट्स की पौष्टिकता को पारंपरिक डोसा की करारापन के साथ जोड़ता है, जिससे यह एक हेल्दी और स्वादिष्ट भोजन बन जाता है। चाहे नाश्ता हो, लंच या डिनर, ओट्स डोसा हर समय के लिए एक बढ़िया विकल्प है।
इस ब्लॉग में, मैं आपको स्टेप बाय स्टेप ओट्स डोसा बनाने की प्रक्रिया”सिखाऊंगी” , जो हल्का, करारा और स्वाद से भरपूर है।
ओट्स डोसा क्यों?
ओट्स पोषक तत्वों से भरपूर होते हैं, जिनमें फाइबर, प्रोटीन और आवश्यक मिनरल्स की प्रचुरता होती है। यह ग्लूटन-फ्री, पचाने में आसान है और लंबे समय तक पेट भरा हुआ महसूस कराता है, जिससे यह वजन प्रबंधन और समग्र स्वास्थ्य के लिए आदर्श बनता है।
ओट्स डोसा बनाना भी काफी आसान और जल्दी होता है, जिससे यह व्यस्त सुबह या बिना झंझट वाले भोजन के लिए परफेक्ट है।
सामग्री:-
बैटर के लिए
- 1 कप रोल्ड ओट्स (या क्विक ओट्स)
- 1/2 कप उड़द दाल
- 1/4 कप चना दाल या चावल का आटा (ऑप्शनल, अतिरिक्त करारापन के लिए)
- 1 बड़ा चम्मच मेथी के दाने
- 1/2–1 कप पानी (आवश्यकतानुसार, बैटर का कंसिस्टेंसी थोड़ा बहने वाला होना चाहिए)
- 1/2 टेबलस्पून नमक (स्वादानुसार)
स्वाद के लिए (वैकल्पिक)
- एक मुट्ठी ताजा धनिया पत्तियां, कटी हुई
पकाने के लिए
- घी या तेल, आवश्यकतानुसार
ओट्स डोसा बनाने की स्टेप बाय स्टेप विधि
स्टेप 1: बैटर तैयार करें
- सामग्री भिगोएं:
एक बड़े बर्तन में ओट्स, उड़द दाल, चना दाल और मेथी के दाने डालें। इन्हें अच्छी तरह धो लें और पर्याप्त पानी डालकर 3–4 घंटे के लिए ढककर भिगो दें। - ग्राइंड करें:
भिगोने के बाद, इन्हें ब्लेंडर में डालें। लगभग 3/4 कप पानी डालकर स्मूथ पेस्ट बना लें। यही आपका डोसा बैटर होगा। - फर्मेंट करें:
बैटर को 4–5 घंटे या रातभर के लिए फर्मेंट होने दें। इससे विटामिन B बढ़ता है और पाचन में मदद मिलती है। फर्मेंटेशन के बाद, इसमें नमक डालें और अच्छे से मिला लें।
स्टेप 2: कंसिस्टेंसी चेक करें
अगर बैटर बहुत गाढ़ा हो गया हो, तो थोड़ा पानी डालें और सही कंसिस्टेंसी पर लाएं।
स्टेप 3: ओट्स डोसा पकाएं
- पैन गर्म करें:
एक नॉन-स्टिक या कास्ट आयरन तवा मध्यम आंच पर गर्म करें। इसे हल्का सा घी या तेल लगाकर चिकना कर लें। - बैटर डालें:
एक करछी बैटर लें और तवे के बीच में डालें। करछी की सहायता से इसे गोल घुमाकर पतला फैला लें। - पकाएं:
किनारों पर थोड़ा घी या तेल डालें। मध्यम आंच पर डोसा तब तक पकाएं जब तक किनारे हल्के उठने न लगें और नीचे का भाग सुनहरा भूरा न हो जाए। - फ्लिप करें (वैकल्पिक):
अगर आप दोनों तरफ से हल्का करारा डोसा चाहते हैं, तो इसे पलटें और 1–2 मिनट तक पकाएं। - दोहराएं:
बचे हुए बैटर के साथ यही प्रक्रिया दोहराएं। बैटर को बीच-बीच में चलाते रहें ताकि सामग्री नीचे न बैठें।
सर्विंग सजेशन
ओट्स डोसा के साथ इन चीज़ों का आनंद लें:
- नारियल चटनी: इसकी क्रीमी और नट्टी स्वाद डोसा के साथ बेहतरीन लगती है।
- टमाटर चटनी: खट्टा और हल्का मसालेदार ट्विस्ट।
- सांभर: एक गर्म, आरामदायक विकल्प।
- पुदीना-धनिया चटनी: ताजा और जायकेदार।
ओट्स डोसा बनाने के 4 टिप्स
- बैटर कंसिस्टेंसी: बैटर ज्यादा गाढ़ा न हो। पतला बैटर आसानी से फैलता है और करारे डोसे बनाता है।
- आराम दें: बैटर को आराम देने से स्वाद बेहतर होता है और टेक्सचर अच्छा बनता है।
- पैन चिकना करें: कम से कम तेल या घी का इस्तेमाल करें, खासकर अगर कास्ट आयरन पैन का उपयोग कर रहे हों।
- कम से मध्यम आंच: डोसा को हमेशा धीमी से मध्यम आंच पर पकाएं ताकि यह जले बिना अच्छे से पक सके।
आपको ओट्स डोसा क्यों पसंद आएगा
- जल्दी और आसान: फर्मेंटेशन की जरूरत नहीं! बैटर बनाइए और एक घंटे के अंदर डोसा तैयार।
- सेहतमंद और पेट भरने वाला: फाइबर और पोषक तत्वों से भरपूर, यह डोसा आपको दिनभर एनर्जेटिक रखता है।
- कस्टमाइज़ेबल: बैटर में अपनी पसंद की सब्जियां, हर्ब्स या मसाले डालें और नए ट्विस्ट आज़माएं।
निष्कर्ष
ओट्स डोसा एक स्वादिष्ट, सेहतमंद ट्विस्ट है जिसे आप बार-बार बनाना चाहेंगे। यह न केवल आपके स्वाद को खुश करेगा बल्कि आपके स्वास्थ्य के लिए भी फायदेमंद है। चाहे यह जल्दी नाश्ते के लिए हो, हल्का डिनर, या परिवार के लिए कुछ पौष्टिक, ओट्स डोसा एक परफेक्ट चॉइस है।
आज ही इस रेसिपी को आज़माएं और बताएं कि यह कैसा बना! क्या आपने इसे किसी खास सामग्री के साथ कस्टमाइज़ किया? आपके क्रिएटिव ट्विस्ट को जानने का मुझे इंतजार रहेगा। खुशहाल कुकिंग! 🌟
Leave a Reply