
English:-
A Simple and Wholesome Recipe
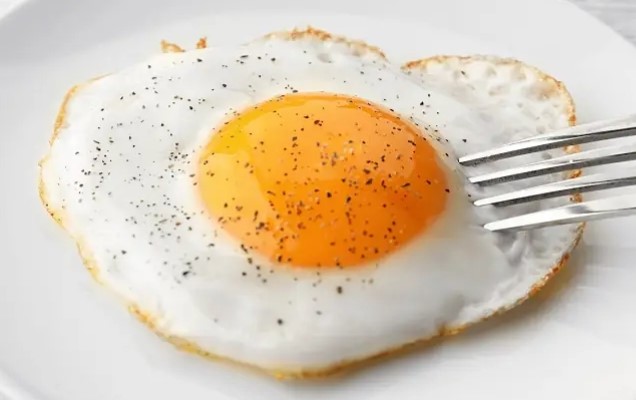
The Art of Perfect Egg Poaching may seem like a small culinary task, but it’s an art in itself. A perfectly poached egg is the epitome of simplicity and elegance—a tender white encasing a warm, runny yolk that oozes like liquid gold. Whether it’s served over toast, on a salad, or as part of a hearty grain bowl, a poached egg elevates any dish.
In this blog post, we’ll take you through the steps of creating the perfect poached egg, along with tips, tricks, and ideas for serving it. So, roll up your sleeves, and let’s dive into this classic yet satisfying recipe.
What Is an Egg Poach?
A water-poached egg is simply an egg cooked gently in simmering water until the whites are firm but the yolk remains soft and runny. Unlike frying or boiling, poaching preserves the egg’s delicate texture, resulting in a healthy and light addition to your meal.
Why Poaching?
Poaching eggs has stood the test of time because of its:
- Health Benefits: No oil or butter is required, making it a heart-healthy cooking method.
- Simplicity: With just water and an egg, you can create a culinary masterpiece.
- Versatility: A poached egg can transform simple dishes like avocado toast, soups, or pasta into gourmet experiences.
Ingredients for a Perfect Water-Poached Egg
You don’t need much to create a poached egg. Here’s your ingredient list:
- 1 fresh egg (the fresher, the better)
- 3 cups of water (enough to create depth in your pan)
- 1 teaspoon vinegar (optional, but recommended for better results)
- A pinch of salt (optional)
- a pinch of black peeper powder
How to Poach an Egg: Step-by-Step Recipe
Step 1: Prepare Your Equipment
Use a medium-sized, shallow pan to make poaching easier. A slotted spoon will be your best friend for lifting the egg out of the water.
Step 2: Heat the Water
Fill the pan with about 3 inches of water. Bring it to a gentle simmer over medium heat. You should see small bubbles forming on the bottom of the pan, but the water should not boil.
Step 3: Add Vinegar
Add a teaspoon of vinegar to the water. This is optional but helps the egg whites firm up quickly, giving your poached egg a neat, round shape.
Step 4: Crack the Egg
Crack your egg into a small bowl or ramekin. This allows you to check the yolk and makes it easier to slide the egg gently into the water.
Step 5: Create a Whirlpool
Use a spoon to stir the water in the pan gently, creating a whirlpool effect. This step is optional but helps the egg white wrap neatly around the yolk, forming a perfect oval shape.
Step 6: Poach the Egg
Carefully slide the egg into the center of the whirlpool. Let it cook undisturbed for about 3-4 minutes for a runny yolk or up to 5 minutes for a firmer yolk.
Step 7: Remove and Drain
Use a slotted spoon to lift the egg out of the water. Place it on a paper towel to drain any excess water.
Step 8: Serve Immediately
Sprinkle a pinch of salt and pepper over the egg, and serve it while it’s warm.
Tips for Poaching Eggs Like a Pro
- Use Fresh Eggs: Fresh eggs have firmer whites that hold their shape better when poached.
- Control the Temperature: Keep the water at a gentle simmer. Boiling water can break the egg apart.
- Practice Makes Perfect: Don’t be discouraged if your first attempt isn’t perfect—poaching takes practice.
- Multiple Eggs: If poaching multiple eggs, avoid the whirlpool method and cook each egg separately to prevent them from sticking together.
Serving Suggestions for Poached Eggs
Poached eggs are incredibly versatile. Here are a few delicious ways to enjoy them:
- Avocado Toast: Top a slice of whole-grain toast with smashed avocado, a poached egg, and a sprinkle of chili flakes.
- Salad Topper: Add a poached egg to a fresh green salad for extra protein and richness.
- Bowl Meals: Place a poached egg over a bed of quinoa or rice, along with sautéed vegetables and a drizzle of soy sauce or dressing.
- Soups: Float a poached egg in a bowl of ramen or tomato soup for added creaminess.
Final Thoughts
Poaching eggs may seem intimidating at first, but with a little practice, you’ll master this timeless technique. It’s a skill worth learning, as it opens up endless possibilities for quick, nutritious, and gourmet meals.
Next time you’re in the kitchen, give this poaching method a try, and transform a humble egg into the star of your meal. Don’t forget to experiment with different ways to serve your poached eggs and share your creations in the comments.
Happy cooking, and here’s to perfectly poached eggs every time!
हिंदी:-
परफेक्ट एग पोचिंग
सरल और पौष्टिक रेसिपी
परफेक्ट एग पोचिंग बनाना एक छोटा सा पाक-कौशल लग सकता है, लेकिन यह अपने आप में एक कला है। एक परफेक्ट पोच किया हुआ अंडा सादगी और सुंदरता का प्रतीक है—नरम सफेद परत के अंदर एक गर्म, तरल जर्दी, जो सुनहरी बूंदों की तरह बहती है। चाहे इसे टोस्ट पर परोसा जाए, सलाद में डाला जाए, या किसी पौष्टिक ग्रेन बाउल के हिस्से के रूप में, पोच किया हुआ अंडा किसी भी डिश को खास बना देता है।
इस ब्लॉग पोस्ट में, मैं आपको परफेक्ट पोच्ड एग बनाने की प्रक्रिया बताऊंगी, साथ ही कुछ टिप्स, ट्रिक्स और इसे परोसने के आइडिया भी देंगे। तो, अपने हाथ तैयार कीजिए और इस क्लासिक लेकिन संतोषजनक रेसिपी को आजमाइए।
एग पोच क्या है?
पोच किया हुआ अंडा, अंडे को धीरे-धीरे गर्म पानी में पकाने की प्रक्रिया है, जब तक कि सफेद परत सख्त न हो जाए और जर्दी नरम और तरल न रह जाए। तलने या उबालने के बजाय, पोचिंग अंडे के कोमल बनावट को संरक्षित करता है, जो इसे आपके भोजन में एक स्वस्थ और हल्का विकल्प बनाता है।
वाटर पोचिंग क्यों?
अंडों को पोच करना समय की कसौटी पर खरा उतरा है, और इसके पीछे कारण हैं:
- स्वास्थ्य लाभ: इसमें तेल या मक्खन की जरूरत नहीं होती, जिससे यह एक दिल के लिए सेहतमंद कुकिंग विधि है।
- सरलता: केवल पानी और अंडे के साथ आप एक बेहतरीन व्यंजन बना सकते हैं।
- बहुउपयोगिता: पोच किया हुआ अंडा एवोकाडो टोस्ट, सूप, या पास्ता जैसे साधारण व्यंजनों को भी गॉरमेट टच दे सकता है।
परफेक्ट पोच्ड एग के लिए सामग्री
पोच्ड एग बनाने के लिए ज्यादा चीजों की जरूरत नहीं होती। सामग्री की लिस्ट देखें:
- 1 ताजा अंडा (जितना ताजा होगा, उतना अच्छा)
- 3 कप पानी (पैन में पर्याप्त गहराई के लिए)
- 1 चम्मच सिरका (वैकल्पिक, लेकिन बेहतर परिणाम के लिए अनुशंसित)
- एक चुटकी नमक (वैकल्पिक)
- एक चुटकी काली मिर्च पाउडर
एग पोच करने का चरण-दर-चरण तरीका
चरण 1: उपकरण तैयार करें
मध्यम आकार का, उथला पैन उपयोग करें, जो पोचिंग को आसान बनाता है। अंडे को पानी से निकालने के लिए स्लॉटेड स्पून का इस्तेमाल करें।
चरण 2: पानी गर्म करें
पैन में लगभग 3 इंच पानी भरें। इसे मध्यम आंच पर हल्के उबाल तक गर्म करें। पानी में छोटे बुलबुले दिखने चाहिए, लेकिन पानी उबलना नहीं चाहिए।
चरण 3: सिरका डालें
पानी में 1 चम्मच सिरका डालें। यह वैकल्पिक है लेकिन अंडे की सफेद परत को जल्दी सख्त होने में मदद करता है, जिससे पोच्ड एग का आकार सुंदर और गोल रहता है।
चरण 4: अंडा तोड़ें
अंडे को एक छोटे कटोरे में तोड़ें। इससे जर्दी की जांच करना और अंडे को पानी में धीरे से डालना आसान हो जाता है।
चरण 5: भंवर बनाएं
पानी में धीरे-धीरे चम्मच चलाकर एक भंवर बनाएं। यह वैकल्पिक है, लेकिन इससे अंडे की सफेद परत जर्दी के चारों ओर लिपट जाती है, और अंडे का आकार सुंदर हो जाता है।
चरण 6: अंडे को पोच करें
अंडे को भंवर के केंद्र में सावधानीपूर्वक डालें। इसे बिना छेड़े 3-4 मिनट तक पकने दें, अगर जर्दी तरल चाहिए, और 5 मिनट तक, अगर जर्दी थोड़ी सख्त चाहिए।
चरण 7: निकालें और सुखाएं
अंडे को स्लॉटेड स्पून से पानी से बाहर निकालें। अतिरिक्त पानी निकालने के लिए इसे कागज़ के तौलिये पर रखें।
चरण 8: तुरंत परोसें
अंडे पर एक चुटकी नमक और काली मिर्च छिड़कें और इसे गर्मागर्म परोसें।
परफेक्ट पोचिंग के टिप्स
- ताजे अंडे का इस्तेमाल करें: ताजे अंडे की सफेद परत सख्त होती है, जिससे यह बेहतर आकार लेता है।
- तापमान नियंत्रित करें: पानी को हल्के उबाल पर रखें। उबलते पानी से अंडा टूट सकता है।
- प्रैक्टिस से परफेक्शन: अगर पहली बार में परफेक्ट न हो तो हताश न हों—पोचिंग अभ्यास से आसान हो जाती है।
- कई अंडे: अगर कई अंडे पोच कर रहे हैं, तो भंवर विधि का उपयोग न करें और हर अंडे को अलग से पकाएं ताकि वे आपस में न चिपकें।
पोच्ड एग परोसने के सुझाव
पोच्ड अंडे बेहद बहुमुखी होते हैं। उन्हें परोसने के कुछ स्वादिष्ट तरीके:
- एवोकाडो टोस्ट: साबुत अनाज की टोस्ट पर एवोकाडो मैश, पोच्ड एग और चिली फ्लेक्स का छिड़काव करें।
- सलाद टॉपर: ताजे हरे सलाद पर पोच्ड अंडा डालें, जिससे प्रोटीन और स्वाद बढ़े।
- बाउल मील्स: क्विनोआ या चावल के बिस्तर पर पोच्ड अंडा रखें, साथ में तली हुई सब्जियां और सोया सॉस या ड्रेसिंग डालें।
- सूप्स: पोच्ड अंडा रेमन या टमाटर सूप के कटोरे में डालें, जो क्रीमीनेस बढ़ाए।
अंतिम विचार
एग को पोच करना शुरुआत में कठिन लग सकता है, लेकिन थोड़े अभ्यास से आप इस कालातीत तकनीक में माहिर हो सकते हैं। इसे सीखना एक कौशल है जो आपको जल्दी, पौष्टिक और स्वादिष्ट भोजन बनाने में मदद करेगा।
अगली बार जब आप रसोई में हों, तो इस एग पोचिंग विधि को आजमाएं और एक साधारण अंडे को अपने भोजन का स्टार बनाएं। विभिन्न तरीकों से इसे परोसने के लिए प्रयोग करें और अपने अनुभव साझा करें।
खुशहाल पकाने की शुभकामनाएं, और परफेक्ट पोच्ड एग का आनंद लें!
Leave a Reply